Linux booting Linux

Introduction
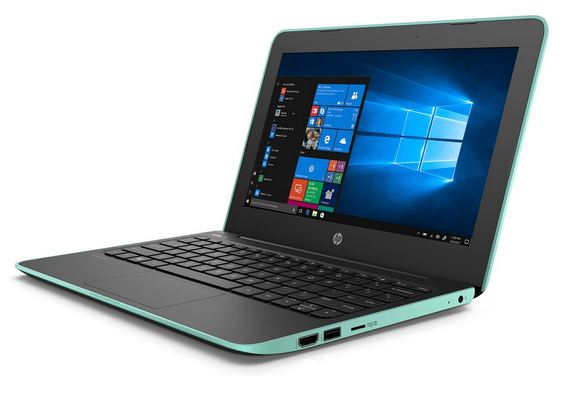
This is an amusing weekend project. I have an old HP Stream 11 Pro G5 laptop that I wanted to repurpose. It originally came pre-installed with Windows 10, and I wanted to use it with Linux. Since my Linux distro of choice is voidlinux I downloaded the Live Image and wrote it to a USB drive.

I plugged the USB drive into the laptop and turned in on. I immeditely spammed the Escape
key to get the boot menu. After selecting the USB drive as the boot device I booted
into Linux. I was able to confirm that voidlinux was able to recognize most of the
hardware in the laptop.
Normally I run my systems by booting from USB drive. However for this laptop that would pose a problem becase this laptop is very basic and only has two USB ports (which are USB2 to boot).
My standard configuration is boot from USB, and the data is in the internal drive. If later I want to change Operating Systems I only need to create a new USB drive and plug it in.
This approach with this HP Stream 11 Pro G5 is not good since as I mention earlier, there are only two USB2 ports. The laptop does have a Micro SD card slot, so instead of creating a USB stick I could simply write to a Micro SD card.


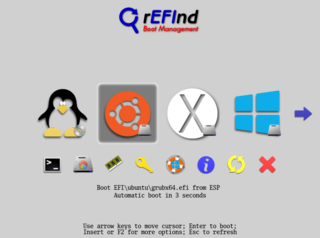
So I wrote the live voidlinux image to a Micro SD card and try to boot from it. Unfortunately, the UEFI BIOS did not recognize the Micro SD card reader, much less detect it as a bootable device. So what I did is use rEFInd as a boot manager to be able to boot either Windows or Linux. If Linux it would boot into a small Linux image. This small Linux image would then load a Linux kernel and InitRAM image from the Micro SD card and boot from it.
This makes it possible to boot SD card images just like I do with USB sticks.
Backing up
Since I really don't use MS-Windows much, I decided to remove the Windows system from laptop. However, since I am sure in the future I would want to send this laptop for re-purposing, I would first need to backup the internal MMC contents.
The internal drive is only 64GB, with compression, it can be backed-up to a 32GB USB stick. For this I am using clonezilla Live. Since this laptop has UEFI boot, preparing a suitable media is very easy.

- Start with an empty USB stick.
- Create two partitions:
- 1GB VFAT partition : for clonezilla software
- remaining space as an
xfsorext4partition to store the backup images
- Create the filesystems on the first and second partitions.
- Download clonezilla Live. I am using the stable Debian based version. If you have more exotic hardware you may need to use the Ubuntu based version.
- Unzip the contents of clonezilla Live to the first partition of USB drive.
With this you have suitable media to perform the backup. As before
plug the USB stick to the laptop, spam the Escape key until you
can get the boot menu and select to boot from the USB stick.
- From the GRUB menu, select Clonezilla Live. Since I am old,
I selected the
VGA with Large Fontoption. Becaue this loads everything to RAM, this would take a bit longer than usual. - After configuring the region and keyboard type, select
Start Clonezilla. - Choose
device-imagemode and selectlocal_devin the next menu.
Breeze through the next couple of screens as the target drive is already inserted. - For the
/home/partimagrepository select the second (large) partition on the USB stick.
The next skip asks forfsck. Just dono-fscksince it is a new partition.
Then select the root folder of the partition when prompted. - Select
Beginnerwhen asked for the Wizard mode to use. - Select
savediskto backup the whole MMC drive, and give a suitable name to the image set. - Select the drive to backup. In my laptop, it is shown as
mmcblk1.
For compression option I chosez9pfor max compression.
The next options are just for error checking. Pick what you think its best.

That starts the backup process. After some time the backup process will finnish. You can put away the USB drive in a safe place. You will need it to reset the laptop for re-use.
For this step there a several options. I chose clonezilla because was the simplest and most straightforward. Personally, I do not like the user experience of the Live USB, but it works.
Underneath it uses partimage which is no longer an active project. One could have used instead a standard live distro and use fsarchiver or partclone. With this we have a simple purpose build USB that contains the restore images in one single package.
Installing Refind

You can download refind from its download page:
The detailed installation instructions can be found here:
For my case I used the voidlinux live USB I used before for testing.
- Boot into voidlinux live USB.
- Since we booted using the USB drive, the EFI partitions is usually
not mounted. To mount:
mount -t vfat /dev/mmcblk1p1 /mnt - Download the binary zip file from getting refind
- Copy refind to the EFI partition:
cp -av refind-bin-VERSION/refind /mnt/EFI/refind - Remove unneeded drivers and/or architectures:
rm -r drivers_ia32 drivers_aa64 - Rename the
refind.conf-sampletorefind.confand edit it to taste.
For example, make sure thatshowtoolsline containsbootorderwhich I use in a later step. - Add refind to the list of available boot loadders:
efibootmgr -c -l \\EFI\\refind\\refind_x64.efi -L rEFInd -d /dev/mmcblk1 - Install additional components (See addons.
Myself, I download the
shell.efifile. - Re-boot system and spam the
Escapekey while booting to get to the BIOS menu. SelectrEFInd. Use the refind utility to change the boot order to make sure that refind is before theWindows boot manager.
Up to now, we are able to boot Linux from either the internal MMC or from a USB drive. In order to boot from the MicroSD card slot we need to create a custom Linux image that can be used to select and load a kernel from the MicroSD card. For that we use buildroot.
The purpose of refind here is to easily support dual-booting Linux and Windows. It is unfortunate that the EFI run-time does not seem to support the MicroSD card reader. If that was the case we could stop now.
There are multiple alternatives to refind such as GNU Grub2. I find grub very Linux oriented and I find the configuration system overly complicated.
Custom Linux
Buildroot is a tool that simplifies and automates the process of building a complete Linux system for an embedded system, using cross-compilation.
In order to achieve this, Buildroot is able to generate a cross-compilation toolchain, a root filesystem, a Linux kernel image and a bootloader for your target. Buildroot can be used for any combination of these options, independently (you can for example use an existing cross-compilation toolchain, and build only your root filesystem with Buildroot).

For our use-case we need:
- Linux kernel with
kexecfunction call enabled and a number of drivers built-in kexecutilities/userspace- Some basic user space utilties (mostly provided by
busybox) dialogutiltiy for user displays
With buildroot we can create a Linux kernel with the necessary drivers and a initrd image with enough utilities to read the MicroSD card reader, give the option to pick a kernel and boot into it.
voidlinux pre-requisites
As one of the steps in buildroot it will build its own fakeroot
command. This does not work in voidlinux with musl runtime. You
must either switch to voidlinux with glibc or follow my recipe
in Mixing glibc with musl.
Preparing a voidlinux system with musl runtime:
sudo env XBPS_ARCH=x86_64 xbps-install \
        --repository=https://repo-default.voidlinux.org/current  \
        -r /glibc -S \
        base-voidstrap
You must also install the following package build dependancies:
base-devel ncurses-devel rsync wget cpioSetting up Buildroot
buildroot is distributed via a git repository. From this repository you can select the version that you want to use.
Fetch buildroot:
git clone  https://git.buildroot.net/buildroot
cd buildroot
git co -b dev 2024.02.9
I have only tested version 2024.02.9. The buildroot project has a LTS
schema where the YYYY.02 releases are considered for long term support/more stable.
I am using out-of-tree builds and also customizations are kept separte from buildroot using the BR2_EXTERNAL functionality.
This keeps things nice and tidy.
The buildroot customizatins are in separate github repository. To use it you need to fetch it with git.
Fech lnxboot repository:
git clone https://github.com/TortugaLabs/lnxboot.git
For the out-of-tree build, you just need to create an empty directory and and set-things up.
Create a folder for out-of-tree building:
mkdir build_dir
cd build_dir
glibc make O=$(pwd) BR2_EXTERNAL=$(readlink -f ../lnxboot) -C ../buildroot lnxboot_defconfig

glibc make- The first
makesets up the out-of-tree build environment. We usedefconfigtarget so that thesavedefconfigfunction works correctly. - The second
makeapplies the configuration settings for
You will find in images of build_dir two files:
- bzImage
- rootfs.cpio.gz
Copy this to the EFI partition and update refind.conf to boot it.
From the build directory you can customize things with this commands:
glibc make menuconfig- Configures buildrootglibc make linux-menuconfig- Configures the Linux kernelglibc make busybox-menuconfig- Configures busybox
Additional make targets:
glibc make img- Create a qemu bootable image (for testing)glibc make run-qemu- Create a qemu bootable image and boot it (for testing)glibc make lnxboot-update- Updates the lnxboot configuration files.