Baremetal backup
![]()
I recently bought a used laptop. Before using it, I wanted to image the disk so that I can restore it to a pristine state. For that I am using Clonezilla. Clonezilla is a partition and disk imaging/cloning program similar to True Image or Norton Ghost. It helps you to do system deployment, bare metal backup and recovery. Three types of Clonezilla are available, Clonezilla live, Clonezilla lite server, and Clonezilla SE (server edition). Clonezilla live is suitable for single machine backup and restore and that is what I am using here. The other versions are used for mass system deployments.
Preparation
For this you need to prepare a USB thumb drive that will contain the Clonezilla software and also accept the baremetal backup. Clonezilla is smart enough to recognize filesystem structure and will only backup up used blocks so the size of the thumbdrive only needs to be as large as the used blocks. When I tested this with a November 2024 Windows 11 image, a 32 GB drive was enough.
In my case, my laptop came with BitLocker enabled. Clonezilla doesn't understand BitLocker drives, so you need to disable it first.
Disabling BitLocker
Boot the PC. In the Setup screens, press Shift+F10 to open a Command Prompt.
Enter the command:
manage-bde -statusTo check the status of BitLocker. To disable BitLocker enter:
manage-bde -off C:Where C: is the drive where BitLocker is enabled. This will start the
BitLocker decryption and can take some time.
Get Clonezilla
Go to the Clonezilla download page, and select the stable branch, since I assume you are using a modern PC, you probably will be using a UEFI firmware. So select AMD64 and zip file type.
Supposely the Ubuntu based version have Kernel that includes non-free firmware which should have wider compatibility. In 2025, this is rare, so using the Debian based version is enough.
Create boot media
So with the USB drive you must first partition it. I would create a EFI partition to contain the Clonezilla software and a data partition to keep the backup image.
If using sfdisk you can use these commands:
sfdisk /dev/sde
> label: gpt
> ;500M;U;*
> ;;L;
sfdisk /dev/sdeis the command with/dev/sdebeing the drive we want to partition.label: gptspecifies that we want to useGPTpartitioning since we are assuming an UEFI firmware.sfdiskwould normally default todoswhich generates an Master Boot Record (MBR) partition instead.;500M;U;*: Define 1s partition as a 500M bootable EFI system partition.;;L;: Define the remaining space as a Linux partition.
You don't have to use sfdisk, this is just an example.
Next you need to create a FAT32 filesystem for the UEFI boot partition.
mkfs.vfat \
    -F 32 \
    -n "CZILLA" \
    -v \
/dev/sde1mkfs.vfat: Create filesystem command-F 32: Specify that we are creating aFAT32filesystem-n "EFISYS": Name of the volume. Can be anything.-v: verbose flag/dev/sde1: Drive partition we are formatting
Create the filesystem for the data:
mkfs.ext4 \
      -b 4096 \
      -E stride=16,stripe-width=16 \
      -i 8192 \
      -m 0 \
      -L data \
      -O ^has_journal \
/dev/sde2mkfs.ext4: Create filesystem command-b 4096: Use 4K blocks.-E stride=16,stripe-width=16: Options recommended for flash media-i 8192: i-node density, 8192 is a good number since for image backups we only have a few large files.-m 0: Reserved space set to0. Recommended for removable media.-L data: Volume label. Can be anything.-O ^has_journal: Disable journaling, recommeded for flash media.
Copy the Clonezilla software:
mount -t vfat /dev/sde1 /mnt
unzip clonezilla-live-3.2.2-5-amd64.zip -d /mnt
umount /mnt
mount -t vfat /dev/sde1 /mnt: Mounts the EFI filesystem in the/mntdirectory.unzip clonezilla-live-3.2.2-5-amd64.zip -d /mntextracs the Zip file to the USB diskumount /mnt: Unmount the filesystem
At this point we are ready to image the baremetal system.
You can use this script to automate this step.
Running Clonezilla
Insert the USB drive into one of your PCs USB ports, and turn on your PC. You may need to get the boot menu. Usually this is done by pressing Escape or Delete keys while the system is booting. Select to boot from the USB drive.
You will be shown the GRUB Boot menu:
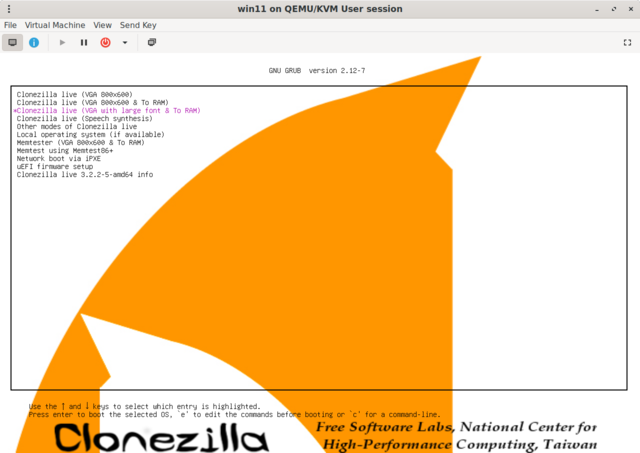
Since I am old, I would choose the large font option. Just choose any option that works for you.
The system will first let you configure the keyboard and display. I just leave things
as default.
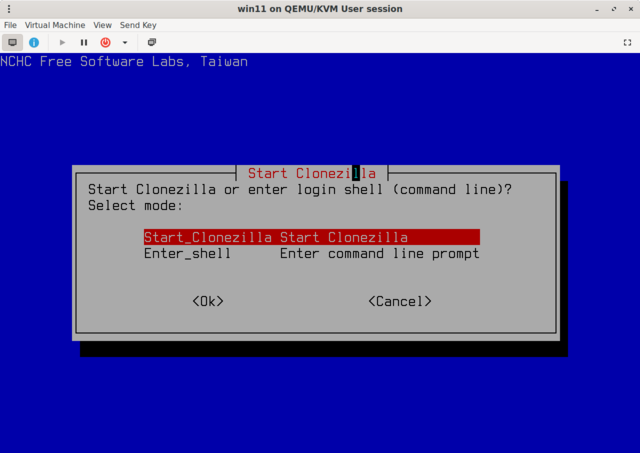
Start Clonezilla
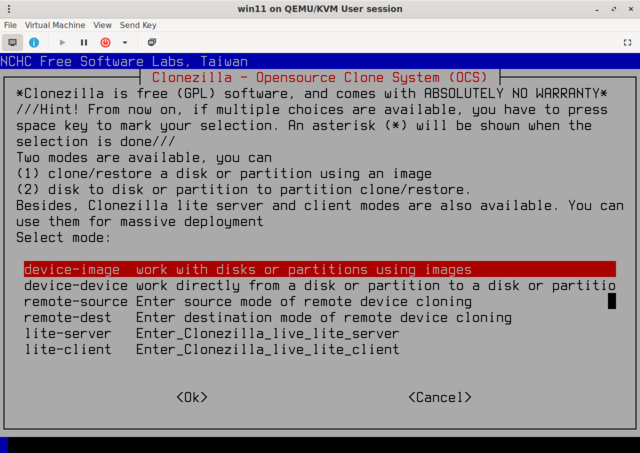
Select device-image on the next menu. This option is for backing up from a device to a image file in a mounted drive.
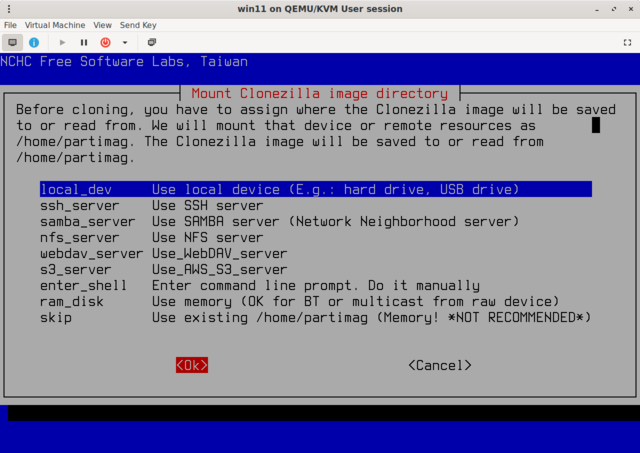
Select local_dev, since we want to save the image to the locally connected boot disk.
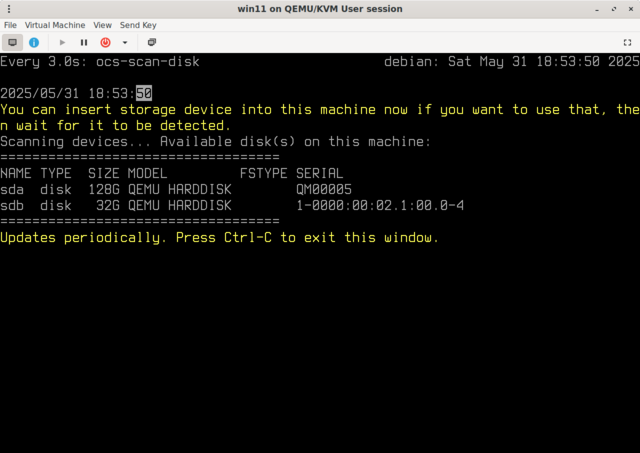
This screen gives you an opportunity to insert a removable drive. Usually it will recognized automatically shown here. Once you see the drive, press Control+C. Since we are using the same USB disk used for Clonezilla you should be able to press Control+C right away.
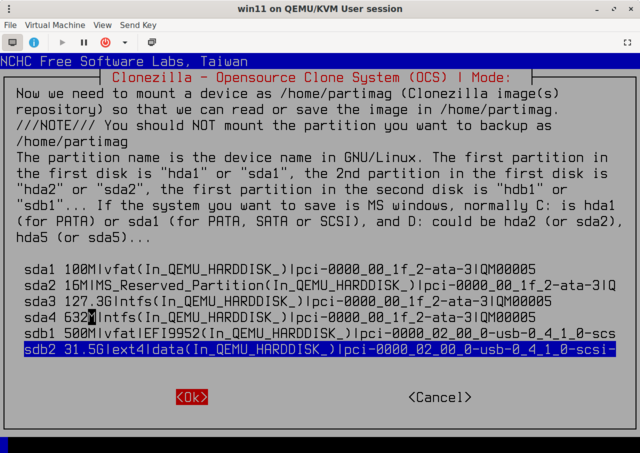
Select the partition to store images. In this example we are using
sdb2 31.5G|ext4|data partition. Remember, we used the -L data option when
formatting the data file system.
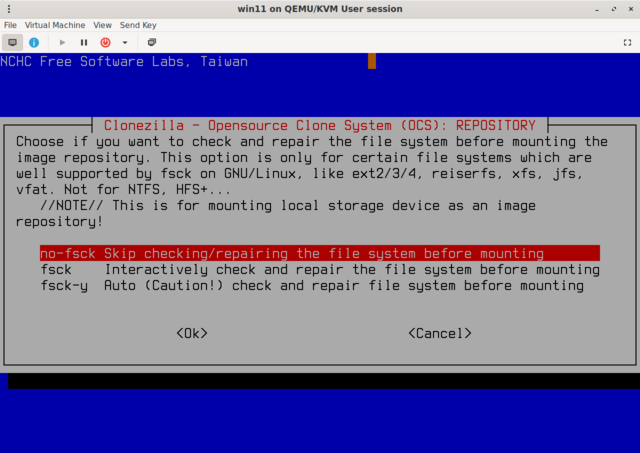
Since we are using newly initialized drives, we can safely use the no-fsck option.

You can select a different directory in the data partition to store images. Just leave as default.
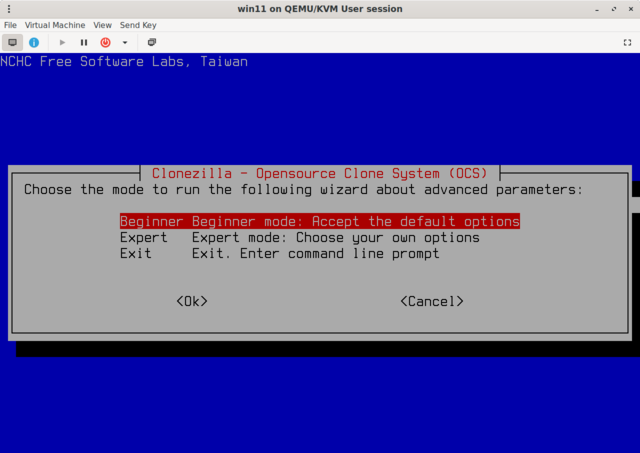
If you have to read this article, you are NO expert, so select beginner mode.

Since we want to make a full backup, select the savedisk option.
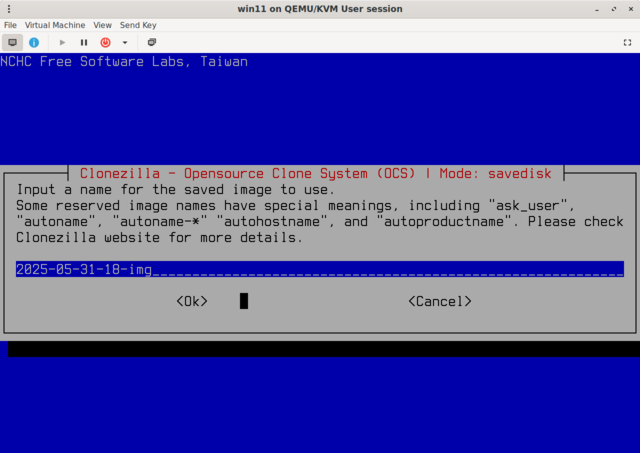
You can change the image name here. I simply leave it as default.
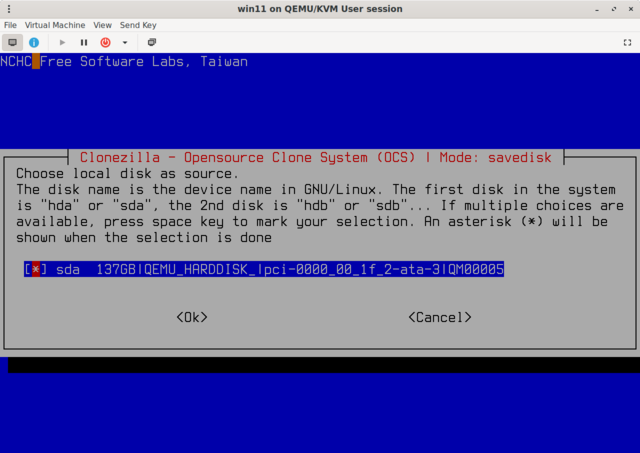
Pick the right disk drive to backup...
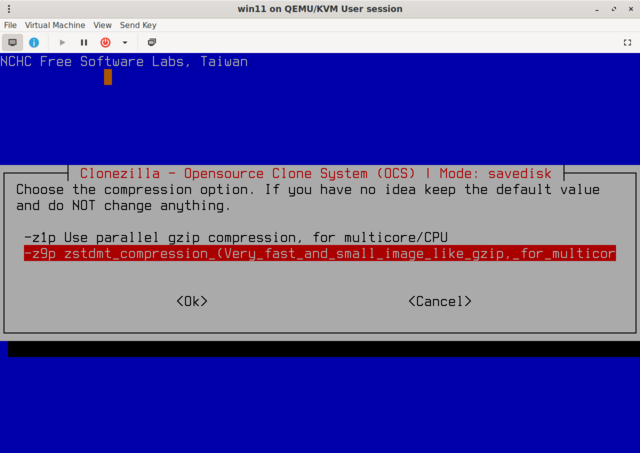
Choose the compression level. Normally just select -z9p as that would generate the smallest file size.

Since we are backing up a Windows systems, the only possible option is sfsck. Only if you suspect that the filesystem is not in a good state you should use one of the remaining options.
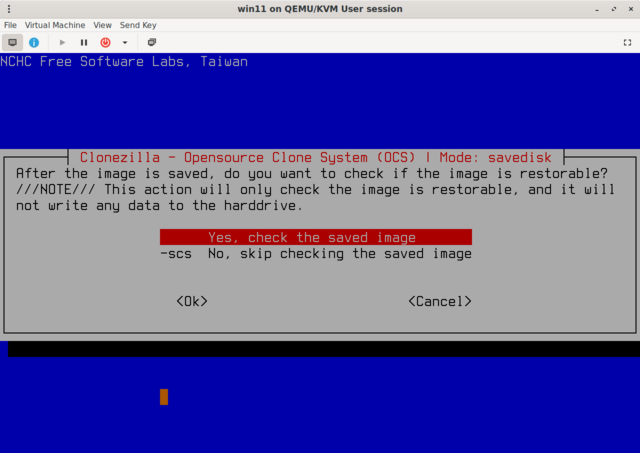
Enable check the saved image. It is a good idea to always do this to make sure the the backup was stored correctly.
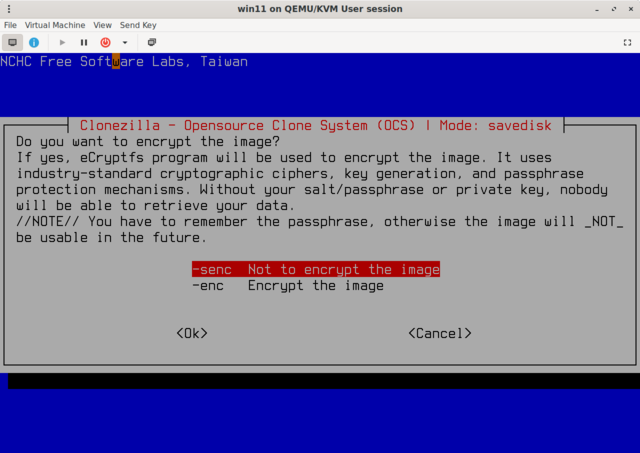
I normally would skip the encryption step as the backup does not contain any sensitive data and I store it off-line.
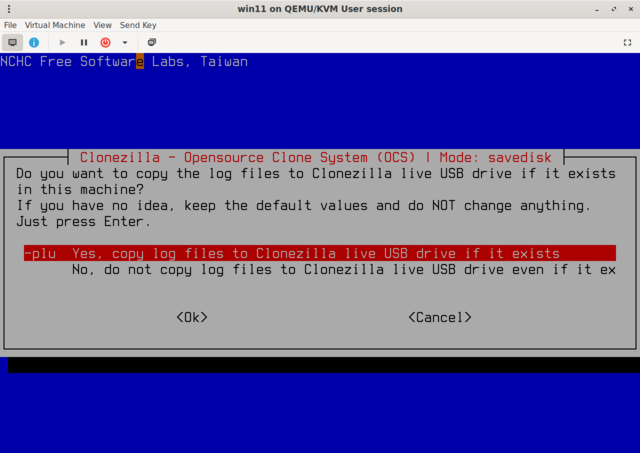
Keep this default (copy log files).
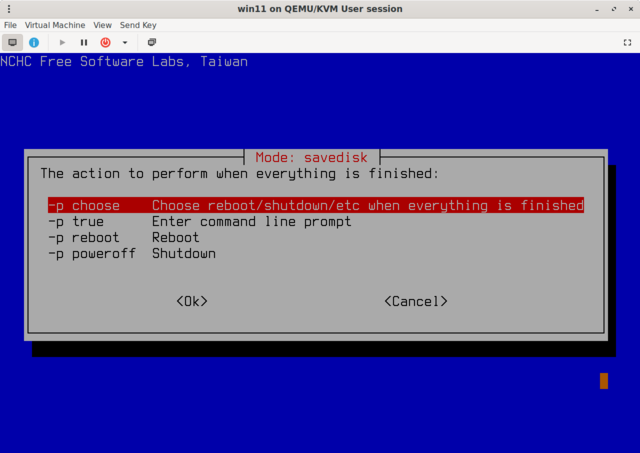
Leave this default, which is to ask what to do once things are done.
After some additional prompts that you may need to acknowledge you will see this screen:
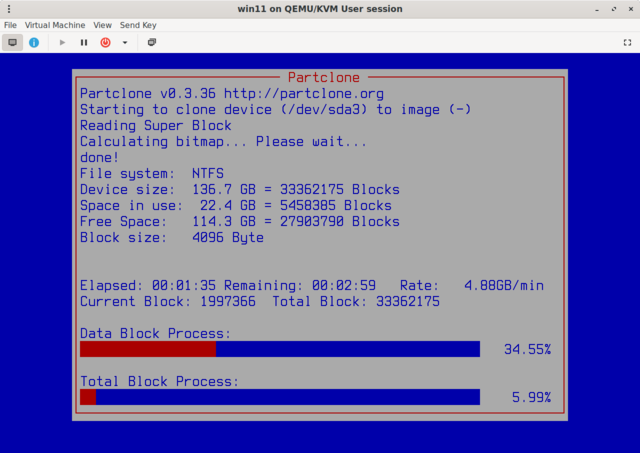
Depending on the disk size, this may take awhile.

Since we selected check the saved image, you will see a checking image screen.
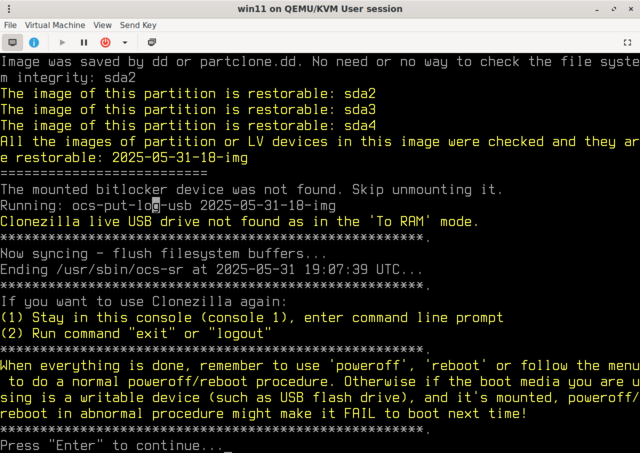
After the backup is completed, you will get this screen. Hit Enter to continue.
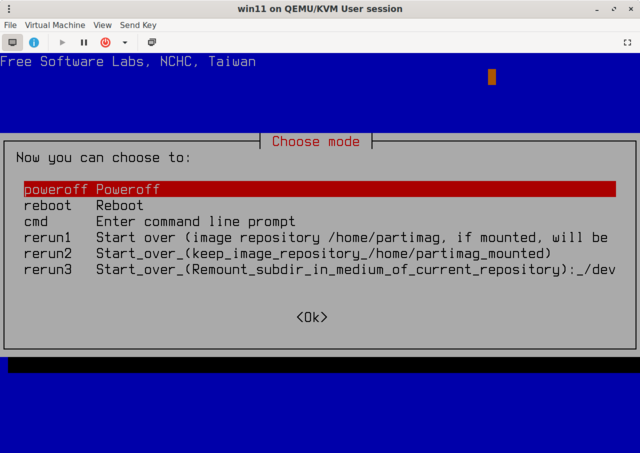
Just poweroff