UEFI boot on Raspberry PI

Introduction
This recipe is to run UEFI boot on the raspberry pi. This is possible because there is an opensource UEFI firmware that has been ported to the Raspberry Pi.
I have tested the fimrware from pftf/RPi3. Which says:
The use of this firmware can greatly simplify the installation of generic Linux distributions such as Debian or Ubuntu as well as Windows 10 (in regular GUI mode, not IoT mode), straight from their ISO images.
This is an installable build of the official EDK2 Raspberry Pi 3 UEFI firmware.
This project states:
This is meant as a generally useful 64-bit ATF + UEFI implementation for Raspberry Pi variants based on the BCM2837 SoC, which should be good enough for most kind of UEFI development, as well as for running consummer Operating Systems in such as Linux, Windows or the BSDs.
Personally, I am using this to load grub and from there boot AlpineLinx. This allows me to have multiple versions of AlpineLinux in one SD card, and use the grub menu to select the version to boot.
This makes it possible to perform and rollback AlpineLinux upgrades without having to reflash the SD card.
Prepare SD card
First step is to create an SD card t o be used (or uSB drive), with a MBR partition
table. Create a partition of of type 0x0c (FAT32 LBA) or 0x0e
(FAT16 LBA). Then format this partition to FAT32. NOTE: Actually I found
an article
stating that the partition type should be 0x0c and the filesystem should be
FAT16. I have tested this configuration, which limits the boot partition to 2GB.
Note: Do not try to use GPT for the partition scheme or 0xef (EFI System Partition) for the type, as these are unsupported by the CPU-embedded bootloader
Copy UEFI
Retrieve the UEFI Firmware from here and extract its files on the partition created in the previous step.
This firmware supports Pi revisions based on the BCM2837 SoC:
- Raspberry Pi 2B v1.2 (older versions are not compatible)
- Raspberry Pi 3A+
- Raspberry Pi 3B
- Raspberry Pi 3B+
- Raspberry Pi CM3
I found additional versions however, these seem to have some hardware compatibility issues:
UEFI boot
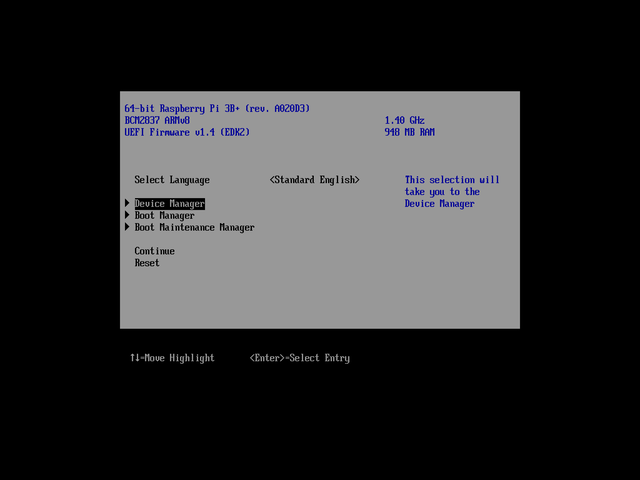
Insert the SD card/plug the USB drive and power up your Raspberry Pi. You should see a multicoloured screen (which indicates that the CPU-embedded bootloader is reading the data from the SD/USB partition) and then the Raspberry Pi black and white logo once the UEFI firmware is ready.

At this stage, you can press Esc to enter the firmware setup, F1
to launch the UEFI Shell, or, provided you also have copied an UEFI bootloader in
efi/boot/bootaa64.efi, you can let the UEFI system run that (which it should do by
default if no action is taken).
Adding grub
At this point you should have an UEFI boot capable Raspberry PI. Now you need to get grub bootloader for the AArch64 architecture. I got mine from the debian netinstall iso.
For convenience the needed files can be found here.
As it is UEFI, you can simply copy the files to the boot partition created earlier.
You should create a boot menu and place it in the boot partition as boot/grub/grub.cfg.
This is an example grub.cfg:
set timeout=10
set default=alpine-rpi-3.19.1,rpi

menuentry "alpine-rpi-3.19.1,rpi (2023-12-27)" --id alpine-rpi-3.19.1,rpi {
  echo "Booting alpine-rpi-3.19.1,rpi ..."
  linux /boot/vmlinuz-rpi modloop=/boot/modloop-rpi modules=loop,squashfs,sd-mod,usb-storage quiet console=tty1
  initrd /boot/initramfs-rpi
}
Installing an operating system
At this point you can boot your Linux based operating system as you would with any other grub based installation.