Using Podman on Alpine Linux

Introduction
I've been using Docker for a few years, and recently decided to switch to Podman for a new server I'm building. I was pleasantly surprised by how quick and easy the transition was.
What is Podman?

Podman is an alternative to Docker Desktop.
Podman is an open source container management tool designed to provide
a daemonless and rootless approach to running containers, setting it apart from
traditional container platforms like Docker. It allows users to manage
containers, pods, and images using a command-line interface similar to Docker's,
making it accessible for those familiar with Docker commands. Podman
is particularly focused on security, enabling containers to run without requiring
root privileges, which helps minimize potential vulnerabilities. It integrates
seamlessly with tools like Kubernetes, supporting native pod management. Developed
as part of the Red Hat ecosystem, Podman is a versatile choice for users
seeking a secure, lightweight, and flexible alternative for container management.
Podman bills itself as an open source alternative to Docker, despite Docker also being open source. Docker Inc., the company behind Docker, has a business model that includes offering commercial products and services around its open source technology.
Podman is an alternative to Docker Desktop. It's an open-source container management tool that offers a daemonless and rootless approach to running containers, differentiating it from traditional platforms like Docker. Podman allows users to manage containers, pods, and images using a command-line interface similar to Docker, making it user-friendly for those familiar with Docker commands. It emphasizes security by enabling containers to run without root privileges, reducing potential vulnerabilities. Podman integrates well with Kubernetes, supporting native pod management, and is developed as part of the Red Hat ecosystem. It's a versatile option for users looking for a secure, lightweight, and flexible alternative for container management.

While Podman promotes itself as an open-source alternative to Docker, it's worth noting that Docker is also open source. Docker Inc. offers commercial products and services around its open-source technology.
Installation on Alpine Linux
Since my preferred server's operating system is Alpine Linux, I installed Podman on a test Alpine Linux virtual machine.
First, enable the Alpine Linux community repository by modifying the
/etc/apk/repositories file and uncommenting the following line:
http://dl-cdn.alpinelinux.org/alpine/vX.YY/communityThen, install Podman with the following command:
apk add podmanTo enable Podman at startup, use:
rc-update add podman
This is all that's needed to run Podman in rootful mode.
Rootful vs Rootless
Podman supports two modes of operation: rootful and rootless. In rootful mode, the container runs as root on the Linux host (or VM on Mac/Windows), while in rootless mode, it runs under a standard Unix user account. Rootless mode offers stronger security, but some containers may not work under the increased restrictions. For example, containers that create new devices or perform restricted operations must run as root. This is different from the USER value in Containerfile/Dockerfile, which affects how processes inside the container perceive themselves. In rootless mode, processes that appear as root inside the container are actually running as a restricted user on the host system.
Since I'm migrating from Docker, I've decided to keep everything in rootful mode.
The Alpine Linux wiki provides steps for installing Podman in
rootless mode. Note that the instructions for running as root are slightly outdated.
Configuring Podman
I usually run my servers in diskless and/or data disk modes. Because Podman expects some data to be persistent, I modify the configuration to store persistent data elsewhere:
Ensure Podman is not running:
service podman stopEdit /etc/containers/storage.conf, find the [storage] section,
and modify the graphroot key to point to your persistent storage location:
graphroot = "/media/data/containers/podman"Make sure that the graphroot directory exists:
mkdir -p /media/data/containers/podmanIf you stopped Podman earlier, you can start it now:
service podman startCompatibility with Docker
For composer compatibility you can use Podman Compose or docker compose itself (with the previously mentioned socket API compatibility). I myself chose to use docker compose instead of Podman Compose becase Podman Compose depends on Python (and I wanted to keep my install leaner).
To enable this you need to install docker compose:
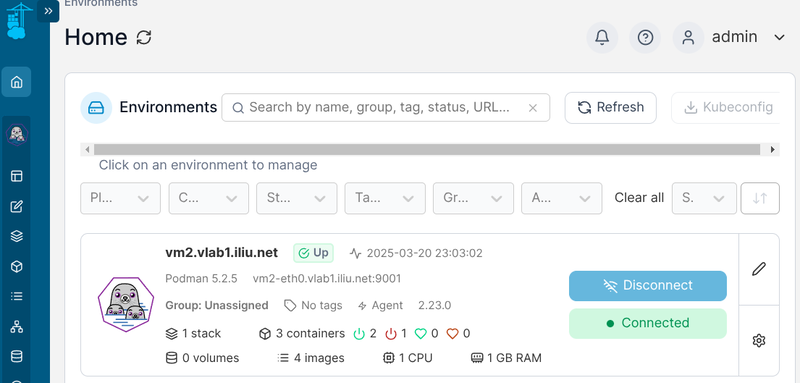
Podman includes a socket API that's drop-in compatible with Docker tools, allowing you to use the Docker CLI, docker-compose, and even Portainer.

For compatibility with compose tools, you can use Podman Compose or docker-compose itself, thanks to the socket API compatibility. I've chosen to use docker-compose instead of Podman Compose because the latter depends on Python, and I wanted to keep my installation leaner.
To enable this, install docker-compose:
apk add docker-cli-composeFor convenience, create a small script at /usr/local/bin/podman-compose:
#!/bin/sh
# Set DOCKER_HOST pass -H to override
export DOCKER_HOST=unix:///run/podman/podman.sock
exec docker-compose "$@"
Using the socket API, you can manage Podman with Docker
commands via the -H option or the DOCKER_HOST environment variable. For more
information, see the Docker manual. On the Podman
host, you can use:
-H unix:///run/podman/podman.sockorexport DOCKER_HOST=unix:///run/podman/podman.sock
Interestingly, you can control a remote Podman instance using this method. For example, you can use the Docker CLI on your development PC to control the Podman instance on your server:
-H ssh://root@remote-server:22/run/podman/podman.sockexport DOCKER_HOST=ssh://root@remote-server/run/podman/podman.sock
Moving of --link'ed containers
Old containers using Container Links can not be moved directly to Podman without changes. The Container Links feature is now obsolete and Docker supports it only for compatibility.

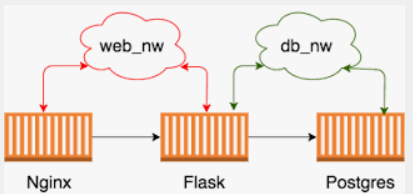
In Podman you are better off creating a new network using:
podman create network NETWORK_NAMEConnect your containers to that network:
podman run -d \
    -p 8080:80 \
    --restart=always \
    --network=NETWORK_NAME \
    nginx:latest
Then you can use the container name using the DNS resolver. Note that the default Podman network has this internal DNS resolver disabled and you need to create a new one.
If you are using docker compose a network is created by default and all the
containers in the stack will be connected to it.