Using LLDP on Linux

Introduction
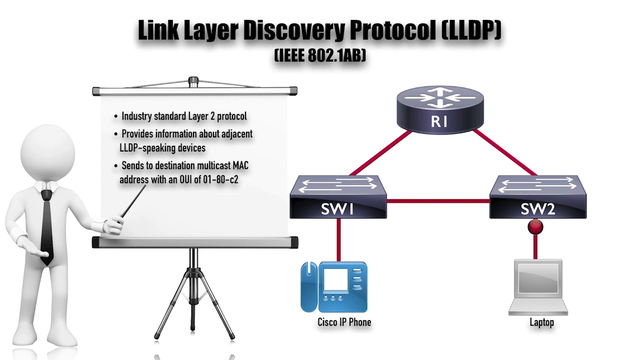
Link Layer Discovery Protocol (LLDP) is a layer 2 neighbor discovery protocol that allows devices to advertise device information to their directly connected peers/neighbors. It is best practice to enable LLDP globally to standardize network topology across all devices if you have a multi-vendor network.
Commonly used layer 2 discovery protocols are often vendor-proprietary, for instance, Cisco’s CDP, Foundry’s FDP, Extreme’s EDP and Nortel’s SONMP. This makes layer 2 discovery difficult in a heterogeneous environment. To counter this, IETF has introduced a standard vendor-neutral configuration exchange protocol -- the LLDP.

Using LLDP, device information such as chassis identification, port ID, port description, system name and description, device capability (as router, switch, hub…), IP/MAC address, etc., are transmitted to the neighboring devices. This information is also stored in local Management Information Databases (MIBs), and can be queried with the Simple Network Management Protocol (SNMP). The LLDP-enabled devices have an LLDP agent installed in them, which sends out advertisements from all physical interfaces either periodically or as changes occur.
Enabling LLDP on Linux
On Linux there are two solutions that can be used to provide LLDP support on your systems:
I personally like lldpd as you only need to install it and it will start working. Another benefit of lldpd is that it has multiple protocol support. lldpd supports CDP, FDP, EDP and SONMP. Unfortunately, lldpd is only available in Alpine Linux's community repositories. The main repositories only contain open-lldp. See this article for explanation of the Alpine Linux repositories.
Because I usually do not like to enable community repos, I had to figure out how to use open-lldp. I found an article which explains how to use open-lldp here.
Using open-lldp
Install and enable the agent:
apk add open-lldp
rc-update add lldpad
service lldpad start
Once running, you need to configure the agent. Currently I am using a
start-up script, but the agent supports a configuration file in
/etc/lldpad.conf. Note the config file is updated automatically
by the lldpad agent when you change its configuration.
Configure things:
lldptool -L -i eth0 adminStatus
lldptool -i eth0 -T -V portDesc enableTx=yes
lldptool -i eth0 -T -V sysName  enableTx=yes
lldptool -i eth0 -T -V sysDesc enableTx=yes
lldptool -i eth0 -T -V sysCap enableTx=yes
lldptool -i eth0 -T -V mngAddr ipv4=192.168.42.66 enableTx=yes
To query neighbors:
# lldptool -t -n -i eth0

Chassis ID TLV
        MAC: 9c:8e:99:bd:b1:20
Port ID TLV
        Local: 12
Time to Live TLV
        120
Port Description TLV
        Port #12
System Name TLV
        switch1
System Description TLV
         HP ProCurve 1810G - 24 GE, P.2.12, eCos-2.0, CFE-2.1
System Capabilities TLV
        System capabilities:  Bridge
        Enabled capabilities: Bridge
Management Address TLV
        IPv4: 192.168.40.11
        Ifindex: 25
End of LLDPDU TLV
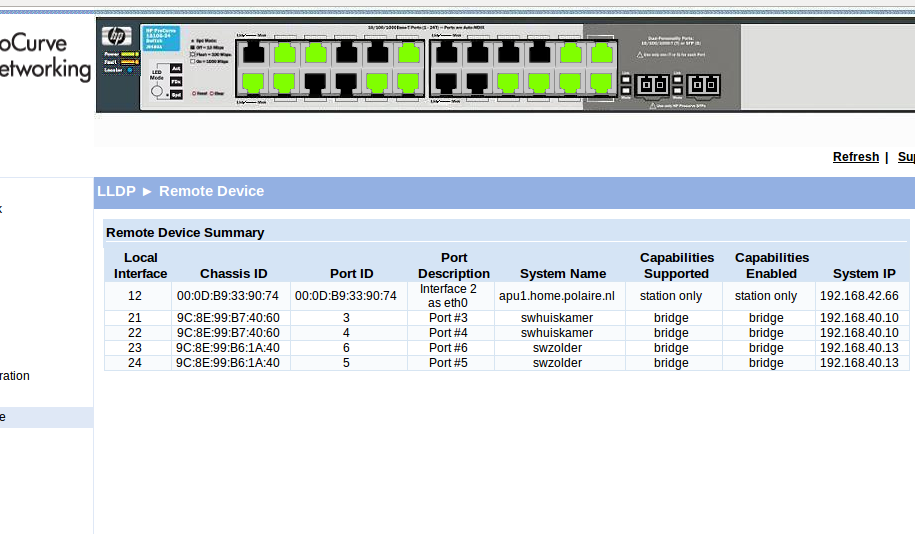
View from switch Web GUI:

To get configured TLV values:
# lldptool -l -i ne0 adminStatus -c
adminStatus=rxtx
# lldptool -i ne0 -t -V portDesc -c
enableTx=yes# lldptool -i ne0 -t -V mngAddr -c
ipv4=192.168.2.6
ipv6=
enableTx=yesUsing lldpd
Enable the community repo in /etc/apk/repositories
Install and enable the daemon:
apk add lldpd
rc-update add lldpd
service lldpd start
This is enough by default. If you want to enable additional
protocols you must modify the file /etc/conf.d/lldpd and
add the relevant options for additional protocol support:
- -c : Enable the support of CDP protocol. (Cisco)
- -e : Enable the support of EDP protocol. (Extreme)
- -f : Enable the support of FDP protocol. (Foundry)
- -s : Enable the support of SONMP protocol. (Nortel)
Query neighbors:
# lldpctl
-------------------------------------------------------------------------------
LLDP neighbors:
-------------------------------------------------------------------------------
Interface:    eth0, via: LLDP, RID: 1, Time: 0 day, 09:50:19
  Chassis:
    ChassisID:    mac d4:01:c3:2f:cc:2e
    SysName:      swap4
    SysDescr:     MikroTik RouterOS 6.49.15 (stable) RBD52G-5HacD2HnD
    MgmtIP:       192.168.2.204
    MgmtIface:    4
    MgmtIP:       192.168.2.3
    MgmtIface:    4
    Capability:   Bridge, on
    Capability:   Router, on
    Capability:   Wlan, on
  Port:
    PortID:       ifname bridge/ether2
    TTL:          120
-------------------------------------------------------------------------------
Hints and Tips

When I first tried this I did a mistake of creating a loop on my network, so STP disabled the port I was running LLDP. Weirdly enough, I would occasionally see neighbors on that port. So to troubleshoot, I was using tcpdump. These are some useful options:
- -i nic : Select the interface
- -v or -vv : more protocol decoding
- -e : Show Ethernet Frame fields
ether proto 0x88cc: select LLDP frames (Protocol ID 0x88cc)
Also when configuring open-lldp, I would want to configure on
the physical devices. I use this loop in bash:
for nic in $(ls -1 /sys/class/net/)
do
  [ ! -d /sys/class/net/"$nic"/device ] && continue
  if [ -f /sys/class/net/"$nic"/device/modalias ] ; then
    # Special rule to filter out xen backend interfaces
    grep -q xen-backend /sys/class/net/"$nic"/device/modalias && continue
  fi

  # CONFIG COMMANDS GO HERE
done
Normally, LLDP frames will not propagate through Linux bridges. This is the intended bridge behaviour. If you are for example using virtualization on your system and would like the VMs to see LLDP frames, you can force LLDP frames to be forwarded. See this article.
Enable LLDP forwarding:
echo 0x4000 > /sys/class/net/<bridge_name>/bridge/group_fwd_maskThis is a runtime change to make this more permanent, I do it from
the Alpine Linux /etc/network/interfaces file:
# /etc/network/interfaces

auto br1
iface br1 inet dhcp
  bridge-ports eth0 eth1
  up echo 0x4000 > /sys/class/net/$IFACE/bridge/group_fwd_mask
On the other hand, on the MikroTik RouterOS switch I am using LLDP frames are passed through by default. So on the neighbors list I would see not just the switch but all the other devices on the other side of the switch. The switch has routing, bridging and switch capabilities. In RouterOS, bridging is done by software, while switching is done by a hardware chip on the device. Since obviously you would want to use switching when possible, you can add a switch rule to filter out LLDP frames:
/interface/ethernet/switch/rule> add switch=switch1 ports=ether3,ether4 mac-protocol=lldp copy-to-cpu=no redirect-to-cpu=yes mirror=no
This needs to be done in the CLI as the WebFIG UI won't let you select the LLDP protocol.
See this. The redirect-to-cpu make sure the CPU gets incoming LLDP for book keeping
but restricts forwarding.